shortcutaub.ie/voicemail
Telephony is a large part of communication at Auburn University. This article contains information on how to log into and use your voicemail, as well as the different types of equipment that is offered.
Accessing Your Voicemail/Mailbox
Employees with voicemail as a feature on their office phones will have a mailbox. The mailbox is where users can check voicemail, change the security code, record greetings, and record the name associated with the mailbox.
To log into the mailbox while on campus, dial 334-844-1000. Once you hear the mailbox attendant, you can enter the security code. If there are any new voicemails, these will start to play immediately.
To log into the mailbox while off-campus, dial 334-844-1000 and enter the mailbox number (the full telephone number) as 334-844-XXXX, followed by the security code.
A Voicemail Quick Reference Card can be found by clicking the button below, and instructions for common commands are also listed below. For assistance, contact the IT Service Desk at (334) 844-4944.
Voicemail Quick Reference Card
Playing Your Voicemail Messages
Via telephone access:
- Log into your mailbox. Any new messages will be retrieved.
- Press 2 to play the current message.
- Press 6 to go to the next message or press 4 to go to the previous message.
- To disconnect, press 8 > 3, or hang up.
- While playing a message:
- To skip back five seconds, press 1; to skip forward five seconds, press 3.
- To play the message slower, press 2 > 1; to play the message faster, press 2 > 3.
- To play the message softer, press 2 > 4; to play the message louder, press 2 > 6.
- To pause, press #; to continue, press 2.
Via email access:
Voicemails are sent to an email Inbox that is associated with the mailbox. You can play these messages by opening the email and playing the file in the attachment.
Changing Your Voicemail Password
- Log into the mailbox.
- Press 8 > 0 > 1 > 4.
- Enter a new security code and press #.
- Enter the new security code again, then press #.
Recording a Voicemail Greeting
- Log into the mailbox.
- Press 8 > 0 > 1 > 3.
- To record your standard voicemail greeting, press 2. If you already have a current message recorded, you can press 4 to discard it. To record a new message, press 2.
- To record an out-of-office greeting, press 3.
- Press 5 to record. Wait for the tone, then record your greeting or name.
- Press # to end your recording.
* To review your recording, press 2.
* To delete a greeting, press 7 > 6. - Press 4 to return to your messages.
Recording your Name
- While logged into your mailbox, press 8 > 0 > 1 > 5.
- Your current recording will play.
- Listen to the prompts to record a new name.
- Press 5 to record. Wait for the tone, then record your greeting or name.
- Press # to end your recording.
* To review your recording, press 2.
* To delete a greeting, press 7 > 6. - Press 4 to return to your messages.
Composing Voicemail Message
A voicemail message can be sent from a user’s mailbox to another user. It is a voice message as opposed to an email message.
- Dial 334-844-1000 and log into your mailbox.
- While logged into your mailbox, press 7 > 5.
- Enter the first address, then press #. You can enter more addresses followed by #. (To cancel an address, press 0 #).
- When you have finished, press # again.
- Press 5. At the tone, record your message, then press #.
- To play the message, press 2.
- To add options and attachments, press 7 > 0, Urgent 1, Private 4, Acknowledge 5, Timed Delivery 6, and Add Attachment 7.
- Press 7 > 9 to send the message.
Responding to Voicemail Messages
Via telephone access:
Before, during, or after playing a message:
Contact Sender
- To contact the sender, press 9. Speak to the person or leave a message, then hang up.
Reply
- To reply to a message, press 7 > 1, record a reply, then press 7 9 to send it.
Reply All
- To reply to the sender and all message recipients, press 7 > 4, record a reply, then press 7 9 to send it.
Forward
- To forward a message, press 7 > 3. Address the message, then press 7> 9 to send it. You can record an introduction before sending the message.
- To play the message envelope, press 7 > 2.
Via email access:
Voicemails are sent to the email inbox associated with the mailbox.
Reply
- Do not reply to a message using the Reply capability in Outlook.
- To reply to a message using a voice reply, please follow the instructions above for replying via telephone access.
Forward
- To forward a message using a text (email) reply, click on the Forward button.
- A new window will open.
- Enter an email address in the “To” field or click on the “To” button to search for email addresses using the Global Address book.
- Click OK.
- Repeat the above procedure for entering email addresses in the CC or BCC fields.
- Click on the Text Message button and enter your text reply message in the Text box below.
- Click the Send button on the toolbar.
Deleting and Restoring Voicemail Messages
Via telephone access:
Delete: Before, during, or after playing a message, press 7 > 6.
Restore: To restore a deleted message, including a message that has been auto deleted by the system, return to the message and press 7 > 6.
Via email access:
Delete: You may delete voice mail messages in the same way you delete email messages. A message deleted through Outlook also removes it from the voice system.
Automatically Forward Voicemail Emails
Use the following steps to set up a rule to automatically forward all voicemail emails.
- Right-click a voicemail email from the list of messages inside Microsoft Outlook.
- Select Rules, then select Create Rule.
- In the Step 1 conditions area, check from AU Voicemail
- Press the Next > button.
- In Step 1: Select the action(s) area, check forward it to people or public group.
- In Step 2: Edit the rule description area, click the people or public group link.
- When the address book window opens, select the recipients, and press the OK button.
- Press the Next button twice.
- On the last screen, check Turn on this rule and press the Finish button.
Using Express Voice Messaging
Express Messaging allows users to directly place a message in another user's mailbox without first ringing the destination phone.
- Lift Handset - Enter the Express message number 334-844-1205.
- Enter the 4-mailbox number and the # key.
- Leave your message after the tone.
- Press # to stop Recording, 2 to play it, 76 to delete it, then 5 to record. Then press 83 and hang up).
Getting to Know Your Polycom VVX 400 Series Phone
Before you use your Polycom VVX 400 series phone, you may wish to take a few moments to become familiar with its features and user interface.
Layout
| The following figure shows the important phone features. |
Soft Keys and Buttons
Buttons are physical keys on your phone which always perform the function for which they are labeled.
Soft keys are functions you see on your LCD screen. They change according to where you are in a call sequence. Select a soft key function by pressing the plastic button directly underneath it.
Phone Views
Your phone has three main views: Lines (the default), Home, and Calls.
Lines View
Lines view is your phone’s default display. This view displays your phone's extension(s), and soft keys.
Home View
Access the Home view by pressing the Home button. Use your phone's Navigation Dial to scroll through and select icons for different functions.
Calls View
The Calls view displays any time you have at least one active call. Use the up and down arrow keys to see and select calls. If your phone has multiple lines, calls display under the associated line.
On Hook and Off Hook
You can perform all the functions of your VVX 400 series phone with the handset still in the cradle (On Hook) or with the handset out of the cradle (Off Hook). In cases where the steps differ slightly, instructions for both On Hook and Off Hook are shown below.
Placing a Call
Using the Dial Pad
On Hook
- With your phone on the hook, dial the number on the dial pad.
- Complete your call by taking one of the following three steps:
- Press the Dial soft key
- Press the Line key.
- Lift the handset.
Off Hook
- With your phone off the hook, dial the number on the dial pad.
- Complete you call by taking of the following two steps:
- Press the Send soft key.
- Wait for the call to complete.
Using the Dialer
The Dialer initially displays a list of previously-placed calls. As you enter digits on the dial pad, the Dialer shows you recently called numbers which match the one you are currently dialing.
On Hook
- With your phone on the hook press the Line Key.
- Use the up and down navigation arrows to highlight the number you want to call.
- Press the Send soft key.
Off Hook
- Lift the handset
- Use the up and down navigation arrows to highlight the number you want to call.
- Press the Send soft key.
Using the Recent Calls List
In addition to placing calls using the dial pad and the Dialer, you may place calls from your Recent Calls list. You can access your Recent Calls list from the Lines View or the Home View.
- When your phone is showing the Lines View, the left, right, and down arrows are a one-touch shortcut to different Recent Calls lists. Press an arrow to access a list.
- Use the navigation arrows to highlight the number you want to call
- Press the Dial soft key.
From the Home View
- From the Home View, Select Directories.
- Select Recent Calls.
- Use the up and and down navigation arrows to highlight the number you wish to call.
- Press the Dial soft key.
Answering Multiple Calls
Your Polycom VVX 400 series phone is equipped with twelve programmable line keys. Depending on how your phone is set up, you may have more than one key programmed for your extension.
Answering Multiple Calls With One Line Key Programmed for Your Extension
- When you are on a call, the caller ID for an incoming call displays on the LCD screen
- Press the answer soft key. The active call will automatically be placed on hold.
- Use the up and down navigation arrows to toggle between calls.
- To place an active call on hold, use the up and down arrow keys to highlight it and press the hold soft key. To pick a call on hold back up, highlight it and press the resume soft key.
Answering Multiple Calls With Two or More Line Keys Programmed for Your Extension
If you handle a high call volume, it is helpful to program at least one additional key for your extension.
- When you are on an active cal, an incoming call rolls over to the next available line key, and the caller ID for the incoming call displays on the LCD screen
- Press the Answer key or the link key on which the call is ringing to answer.
- The original call will automatically be placed on hold.
Transferring Calls
To transfer a call follow these steps:
- Press the "Transfer" soft key. The caller will be put on hold.
- Dial the phone number for the recipient.
- When the recipient answers the call, announce the caller.
- Press the "Transfer" soft key again to complete the transfer.
Cancelling a Call Transfer
Press the Cancel soft key at any point prior to completing a transfer to return to the original call.
Placing and Handling Three Way Call
Placing A Three Way Call
- When you are on an active call, press the More soft key.
- Press the Confrnc soft key. Your active call will automatically be placed on hold.
- Dial the party you would like to add to the conference call.
- When the party you dialed answers the call, press the More soft key.
- Press the Confrnc soft key.
Dialing Instructions
| Emergency | 911 |
| Auburn Police Department (Non-Emergency) |
Area Code (334) 501-3100 |
| 10-Digit Dialing for All Calls (Local Number, On Campus, and Off Campus) | Area Code + Number |
| Long Distance (10-Digit Dialing Required) | Area Code + Number |
| Long Distance Information | Area Code + 555 + 1212 |
| Voice Mail Access | 334-844-1000 on campus 844-1000 off campus |
International Calls
International calling must first be enabled; submit a Telephone Service Request to enable international dialing.
| International Calls | 011 + Country Code + City Code + Number |
Commonly Used Access Codes
You phone system's most commonly user access codes are listed below:
| New Feature Codes | |
| Call Forwarding Activation | *71 |
| Call Forwarding Deactivation | *61 |
Call Forwarding can also be enabled from the Polycom phone device by tapping the Forward soft key. Choose the Forward type and enter the number to forward calls to. Press Enable. To Disable call forwarding, tap the Forward soft key and Disable the selected Forward type.
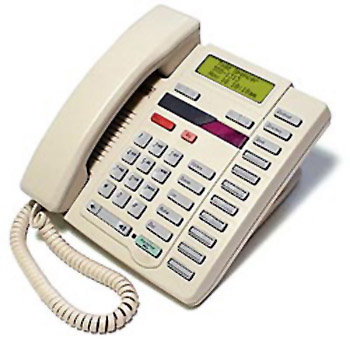
The M9316 features a convenient display window, caller id, and a speaker phone. It's perfect for busy people who need their hands free for note taking or data entry while on the phone.
Feature Highlights
- Two separate lines with station conferencing key
- Caller ID and CLASS
- 2x16 adjustable display
- Speakerphone with mute
- Call Log stores name, number, date, and time of 100 callers
- Downloadable Personal Directory for 100 names and numbers
- Message Waiting indicator*
- Six programmable memory keys for frequently called numbers or feature access codes
- Redial key for last 10 numbers dialed
- Headset compatible
- Restricted dialing option
- Visual ringing/extension-in-use/ hold indicator
- LINK/Release/Hold keys
- Optional page key
- Programmable call timer
- English/Spanish prompts
- Hearing aid compatible
- ADA compliant
- Desk or wall mountable
PROGRAMMING YOUR PHONE
- With the handset in the cradle, press SAVE.
- Press the AutoDial button you are programming.
- Dial the telephone number or feature code exactly as you would normally dial it (4-XXXX or 9-XXX-XXXX).
- Press SAVE a second time.
- Follow the instructions on the digital display to assign a name to the AutoDial button.
OR, press SAVE a third time.
AUTODIAL buttons are programmed by the user.
AutoDial
- Program the AUTODIAL buttons following the instructions above.
- Lift the handset and press the programmed AUTODIAL button.
Call Forward
*71 to activate
*61 to cancel
- Lift the handset and dial *71.
- After the tone, dial the number you wish to forward your calls to and hang up.
- If you would like to forward your phone to an off-campus number you will need to request Call Forward Universal.
- To request this please click here to be taken to the Telephone Forms.
To cancel: Lift the handset and dial *61.
TIP: For convenience, program this feature to an AUTODIAL button.
Last Number Redial
- Lift the handset and press the REDIAL button or ##.
Call Pickup
*73
- Lift the handset and dial *73.
- You will intercept a call coming into another phone in your Call Pickup Group.
TIP: If more than one line in the group is ringing, you will intercept the one that began to ring first.
Note: This feature must be set up through the OIT HelpDesk.
Intercom
- Pick up the handset and press the button marked Intercom (I/C) or Group Intercom (GIC).
- Dial the two-digit intercom number.
Speed Dial (Program Long, Program Short)
*77 (Speed Call Single Digit programming)
*78 (Speed Call Double Digit programming)
Note: Feature must be set up through the OIT HelpDesk.
TO PROGRAM SPEED DIAL:
- Lift the handset and dial *77 to program Speed Call Single or *78 to program Speed Call Double.
- After the tone, dial a one-digit code (0-9) for Speed Call Single or a two-digit code (00-29) for Speed Call Double.
- Dial the phone number, exactly as you would normally dial it (4-XXXX or 9-XXX-XXXX). Press the # key. After the tone, the number has been saved and you can hang up.
TO USE SPEED DIAL:
- Once programmed dial *47 to access the Speed Call Single menu.
- Once programmed dial *48 to access the Speed Call Double menu.
TO ERASE SPEED DIAL:
- *97 erases Speed Call Single programming
- *58 erases Speed Call Double programming
TO USE SPEED CALL:
- Lift the handset and press *, followed by the one or two-digit code.
Dialing Instructions
10 Digit dialing may or may not be available on all phone models. If 10-digit dialing does not function, try Local Dialing with 9 + the number or Long Distance with 9 + 1 + area code + number.
| Emergency | 911 |
| Auburn Police Department (Non-Emergency) |
(334) 501-3100 |
| 10-Digit Dialing / Local Number / Off Campus | Area Code + Number |
| 10-Digit Dialing / Local Number / On Campus | Area Code + Number |
| Long Distance (10-Digit Dialing Required) | Area Code + Number |
| Long Distance Information | Area Code + 555 + 1212 |
| Voice Mail Access | 334-844-1000 on campus 844-1000 off campus |
International Calls
International calling must first be enabled; submit a Telephone Service Request to enable international dialing.
| International Calls | 011 + Country Code + City Code + Number |
Meridian 9316/9417
- Two separate lines with station conferencing key
- This is available on the 9417 only. The 9316 is a single line phone.
- Caller ID and CLASS
- 2x16 adjustable display
- Speakerphone with mute
- Call Log stores name, number, date, and time of 100 callers
- Downloadable Personal Directory for 100 names and numbers
- Message Waiting indicator*
- Six programmable memory keys for frequently called numbers or feature access codes
- Redial key for last 10 numbers dialed
- Headset compatible
- Restricted dialing option
- Visual ringing/extension-in-use/ hold indicator
- LINK/Release/Hold keys
- Optional page key
- Programmable call timer
- English/Spanish prompts
- Hearing aid compatible
- ADA compliant
- Desk or wall mountable
AUTODIAL buttons must be programmed by the user.
PROGRAMMING YOUR PHONE
- With the handset in the cradle, press SAVE.
- Press the AutoDial button you are programming.
- Dial the telephone number or feature code exactly as you would normally dial it (4-XXXX or 9-XXX-XXXX).
- Press SAVE a second time.
- Follow the instructions on the digital display to assign a name to the AutoDial button.
OR, press SAVE a third time.
AutoDial
- Program the AUTODIAL buttons following the instructions above.
- Lift the handset and press the programmed AUTODIAL button.
Call Forward
*71 to activate
*61 to cancel
- Lift the handset and dial *71.
- After tone, dial the number you wish to forward your calls to and hang up.
- If you would like to forward your phone to an off-campus number you will need to request Call Forward Universal.
- To request this please click here to be taken to the Telephone Forms.
To cancel: Lift the handset and dial *61.
TIP: For convenience, program this feature to an AUTODIAL button.
Hold
- With the caller on the line, press HOLD.
- To return to the caller, press the line button (the line the caller is on).
Last Number Redial
- Lift the handset and press the REDIAL button or ##.
Transfer/Three Way Call
- With the caller on the line, press LINK.
- After you hear dial tone, dial the number.
- After you hear a ring, hang up.
OR, wait until the party answers, announce the caller, then press RLS to hang up.
OR, announce you would like to conference call, then press LINK a second time to connect all three parties.
Two Line Conference
- Dial the first party on Line 1.
- After they answer, press CONFERENCE.
- Select Line 2 and dial the second party.
- After they answer, press CONFERENCE to join all three lines.
Call Pickup
*73
- Lift the handset and dial *73.
- You will intercept a call coming into another phone in your Call Pickup Group.
TIP: If more than one line in the group is ringing, you will intercept the one that began to ring first.
Note: This feature must be set up through the OIT HelpDesk.
Intercom
- Pick up the handset and press the button marked Intercom (I/C) or Group Intercom (GIC).
- Dial the two-digit intercom number.
Speed Call (Program Long, Program Short)
*77 (Speed Call Single Digit programming)
*78 (Speed Call Double Digit programming)
Note: Feature must be set up through the OIT HelpDesk.
TO PROGRAM SPEED DIAL:
- Lift the handset and dial *77 to program Speed Call Single or *78 to program Speed Call Double.
- After the tone, dial a one-digit code (0-9) for Speed Call Single or a two-digit code (00-29) for Speed Call Double.
- Dial the phone number, exactly as you would normally dial it (4-XXXX or 9-XXX-XXXX). Press the # key. After the tone, the number has been saved and you can hang up.
TO USE SPEED DIAL:
- Once programmed dial *47 to access the Speed Call Single menu.
- Once programmed dial *48 to access the Speed Call Double menu.
TO ERASE SPEED DIAL:
- *97 erases Speed Call Single programming
- *58 erases Speed Call Double programming
TO USE SPEED CALL:
- Lift the handset and press *, followed by the one or two-digit code.
*77 (Speed Call Individual)
*78 (Speed Call Long)
Note: Feature must be set up through the OIT HelpDesk.
TO PROGRAM SPEED CALL:
- Lift the handset and dial *77 (for Speed Call Individual) or *78 (for Speed Call Long).
- After the tone, dial a one-digit code (0-9) for Speed Call Short or a two-digit code (00-29) for Long.
- Dial the phone number, exactly as you would normally dial it (4-XXXX or 9-XXX-XXXX). Press the # key. After the tone, the number has been saved and you can hang up.
TO USE SPEED CALL:
- Lift the handset and press *, followed by the one or two-digit code.
Caller ID (with number)
The Meridian 9316 has true Caller ID.
Dialing Instructions
10 Digit dialing may or may not be available on all phone models. If 10-digit dialing does not function, try Local Dialing with 9 + the number.
*If you are having difficulties using your long-distance code, try dialing 9 + 1 + Area Code + Number.
| Emergency | 911 |
| Auburn Police Department (Non-Emergency) |
(334) 501-3100 |
| 10-Digit Dialing / Local Number / Off Campus | Area Code + Number |
| 10-Digit Dialing / Local Number / On Campus | Area Code + Number |
| Long Distance | Area Code + Number |
| Long Distance Information | Area Code + 555 + 1212 |
| Voice Mail Access | 334-844-1000 on campus 844-1000 off campus |
International Calls
International calling must first be enabled; submit a Telephone Service Request to enable international dialing.
| International Calls | 011 + Country Code + City Code + Number |